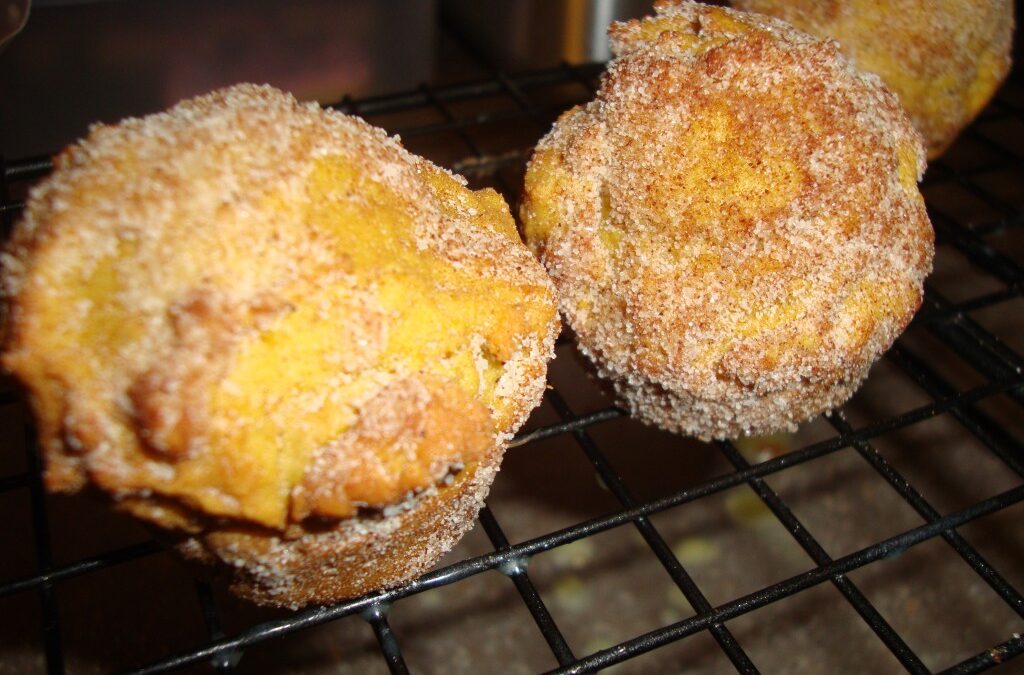
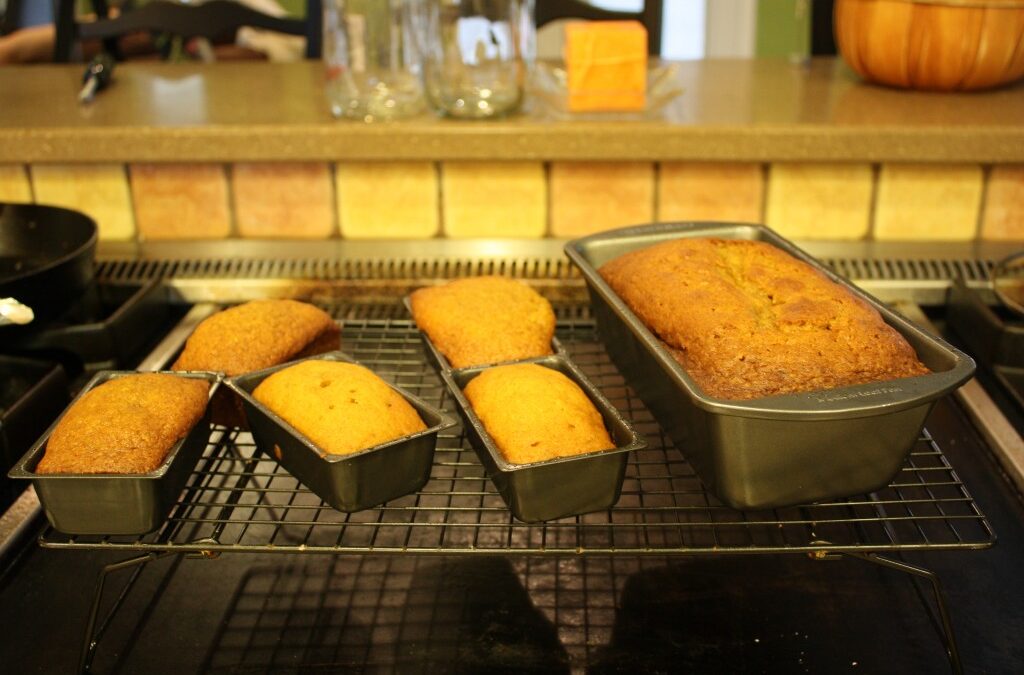
Category Archives: Dessert

SweeTango Apples – Mmmm!

We are major fruit eaters at our house.  I always have fresh fruit in the house because it is something I can be certain Judah will eat.  When he’s being picky and only eating small bites here and there I love knowing I can give him some apple slices, mandarin oranges, clementines, berries, among other fruits and he’ll gobble them up.

That’s why I jumped at the opportunity to review the new SweeTango apples when Walmart asked if I was interested.  SweeTango is a new variety of apples produced over the last decade by agriculture professors at the University of Minnesota. This new apple variety has been a labor of love for the university and a network of family-owned orchards to grow these apples.  These apples are being grown in Michigan, Wisconsin, Minnesota, and Washington states.

The SweeTango apple was available last year – but in limited quantities and only in certain regions of the country.  They are expecting a crop three times as large this fall and beginning this September they will be available at Walmart stores across the country.  Be on the look out, they may not be called out but you will know them by their stickers – they will say SweeTango.

I love apples and make a special trip to the local orchards here each fall with my family.  It is something we look forward to.  But, there is nothing I hate worse than a mealy apple.  So, I was thrilled when I bit into my first SweeTango apple.  It is a cross between the Honeycrisp and the Zestar apples.  It is very crispy and both sweet and tart at the same time.  I think it is very similar to the taste of a Fugi (which is my favorite) but it has a nice tart background flavor that the Fugi doesn’t have – kind of like a Granny Smith.

However you explain it, it is delicious.  I know I’m not the only one enjoying these apples because they are quickly vanishing from our produce drawer!

They are fabulous by themselves and make a great fruit to throw in a lunch box or in your purse as you run out the door, but Judah and I make them special by dipping them in our favorite marshmallow dip.  I slice a SweeTango apple up and a few spoonfuls of this dip and we enjoy it as a quick before bedtime snack while I read him a bedtime story.  If you’d like to give our dip a try, it is quite simple:

:: Marshmallow Fruit Dip

1 container (the small/regular size) marshmallow cream
1 (8 oz) block of cream cheese (at room temperature)

Blend the two ingredients together with a mixer and chill. Serve with any kind of fruit – apples, grapes, and strawberries are our favorites!

Post to Twitter Post to Plurk Post to Yahoo Buzz Post to Delicious Post to Digg Post to Facebook Post to MySpace Post to Ping.fm Post to Reddit Post to StumbleUpon

Best-Ever Mini Banana Nut Muffins

I love banana bread but to bake a big loaf you’ve got to have time…and time I “ain’t got.”  Time is precious -especially when you have a little helper in the kitchen.  Judah is willing to wait for a few minutes but you will have a bear on your hands if you ask him to wait an hour (the length of time it takes to make a large loaf of banana bread).

I know, I know, I could bake it the night before – but I never think about it or have the energy for it lately.  That’s why I changed my banana bread recipe into a banana muffin recipe.  I cook the batter in mini muffin muffin pans.   Mini muffins are smaller and so they cook faster – but you still get the same delicious flavor.   Bonus – less time in the oven means less heat in the house!

These delicious little morsels are a perfect breakfast or snack for little hands but they are also great for taking to the office because they will make a batch of about 48.

:: Best-Ever Banana Muffins

1/2 cup butter
1 cup sugar
2 eggs
2 cups self rising flour
3 mashed bananas
3/4 cup nuts (optional – I like pecans)

Preheat oven to 350 degrees. Cream the butter and sugar. Add the eggs and beat in. Add the bananas. Add the flour and beat until smooth. Fold in nuts (if using). Pour batter into prepared mini muffin pans. Bake for 8 minutes (or until just done). Serve with soft, room temperature butter. Mmmmm.

Note: You can make regular sized muffins – just cook longer.  I love making the mini ones though, because they are so speedy!

Post to Twitter Post to Plurk Post to Yahoo Buzz Post to Delicious Post to Digg Post to Facebook Post to MySpace Post to Ping.fm Post to Reddit Post to StumbleUpon

Strawberry and Nutella Crepes

My son loves waffles and pancakes and I make many different variations including ones with chocolate chips, nuts, or fresh fruit folded into the batter.  We also like them topped with maple syrup, fresh fruit syrup, and peanut butter for a quick way to enjoy them while running out the door!

I don’t know why I didn’t think to serve him crepes before, they are quick and simple and delicious!  I love them for breakfast but they are also fabulous for dessert.

Many people are afraid to tackle crepes because they seem impossible but actually, I’ve found they are almost impossible to mess up!  And, I love that you can whip up this recipe in a blender and then store the leftover batter right in the blender in the fridge for the next morning!

This morning I made them for Judah with a good smear of Nutella and lots of sliced up strawberries.  We had them yesterday with Nutella and bananas.  They are also delicious with yogurt, fresh fruit, peanut butter, chocolate syrup… are there any ways that these are bad?

I make them in a regular stainless steel pan – a nonstick pan is not required (and I don’t use them!) as long as you use a little butter before adding the batter.

:: Crepes

1 cup whole milk
1/2 cup cornstarch
1/4 cup all purpose flour
3 large eggs
3 tablespoons butter, melted (plus more for buttering the pan)
2 tablespoons sugar
1 teaspoon vanilla extract
sliced strawberries (or any other fruit that you enjoy)
Nutella

Place all the ingredients (except the strawberries and Nutella) into a blender.  Blend until the ingredients are mixed well and a batter is formed.

Heat pan over medium to medium-low.  Place some butter in the pan and make sure the entire pan has a good coating.  Using a ladle, ladle in some of the batter (the trick is not to make them too thick – so only put in enough batter that you coat the bottom of the pan with a thin layer).  Swirl the pan to even out the batter.

They don’t take long!  Check for two things – the middle to look done and the bottom to be brown.  You don’t flip it!  Just lift the crepe with a heat proof spatula to check that the bottom is brown and if so, scoop it out or flip it out onto the plate.

Smear with a heaping teaspoon of Nutella and place straberries down the center.  Fold up and enjoy!

Post to Twitter Post to Plurk Post to Yahoo Buzz Post to Delicious Post to Digg Post to Facebook Post to MySpace Post to Ping.fm Post to Reddit Post to StumbleUpon

Homemade Blueberry Syrup – Fabulous for Waffles & Pancakes!

Many of you have commented here about how your family has ditched the pancake syrup that is made with high fructose corn syrup and have opted for the real stuff – maple syrup – only to be dismayed that they cost is too high or that your family doesn’t like the taste.

While I do purchase and use maple syrup, I actually prefer fresh fruit syrups on my pancakes and waffles when the berries are in season.  I’m going to share how I make up a batch of blueberry syrup but you can use this same method with other varieties of berries and fruit: strawberries, cherries, raspberries, blackberries, etc.  This is also a good way to use up fresh berries that are on there last leg in the fridge – so they don’t go to waste!

This recipe is easy to whip up while your making a big ol’ stack of pancakes or waffles and you can serve it immediately.  Store the leftovers in a sealed container in the fridge for up to a couple months. However, you can make this up a head of time and actually you could can it for later use if you so desired!

Here’s how I make up a batch for a morning treat:

:: Bluberry Syrup

2 cups organic blueberries
1/2 cup of sugar
1/2 cup of water

Place all ingredients in a saucepan on the stove and allow to boil. Once a syrup has been made by the sugar and water take a potato masher and mash the berries up to the consistency that you like (I like it a little lumpy so that some of the berries are totally mashed up). Allow the syrup to cook a little longer until the syrup will coat the back of your spoon (generally this syrup takes 10 to 15 minutes but you will want to watch it for the right consistency. If it thicken too much you can always add water, but you don’t want to scorch the sugar!).

At this point the syrup is ready to eat. I like the skin and fruit in my syrup. However, if your family prefers a true syrup (without the skin and fruit, only the juice), just strain the syrup through a sieve.

Serve over warm pancakes, waffles, or stirred in yogurt or on top of ice cream!

Post to Twitter Post to Plurk Post to Yahoo Buzz Post to Delicious Post to Digg Post to Facebook Post to MySpace Post to Ping.fm Post to Reddit Post to StumbleUpon

Heavenly Apple Croustade

I have several bags of frozen apples from when I picked them last fall.  They are already presliced for cooking with but the problem is, I haven’t known what to do with them besides make apple pie.  Since I don’t want to fatten my family up by baking tons of apple pies they have just sat there…sadly unused.

This week I received some Bob’s Red Mill Almond Flour that was just begging me to make some sort of cookies, cake, or tart.  I decided to finally use some of those apples and make a croustade.  I am also planning to cook some of the apples in butter and brown sugar to serve with dinner  {restaurants call them “fried apples” I think}. Here’s how I made the croustade, my family raved about it!  Definitely a hit and the crust tasted more like a cookie than pie crust! Yum!

:: Heavenly Apple Croustade

1  cup all-purpose flour
1/2 cup almond flour*
2 Tbsp sugar
1/4 tsp salt
10 Tbsp (1 1/4 sticks) of unsalted butter, chilled and cut into 1/2 -inch pieces. (I use organic and use it straight out of the fridge)
3 Tbsp of ice water
1/3 cup cream cheese
1 tsp vanilla extract
1 tsp almond extract
2 Tbsp honey
1 qt frozen apples (you could also use fresh apples – use what you’ve got!) sliced
1/2 cup to 3/4 cup of brown sugar
1/4 cup of apple jelly (or other kind such as pear)

Combine the flour, sugar, and salt in the food processor. Add the butter and pulse until mixture resembles course meal. With the machine running, gradually add the water until the mixture clumps together into a dough ball. (You may need to add a Tbsp more or less of ice water – it will literally roll itself into a ball in your food processor. Take it out of the food processor and form into a nice ball then wrap in plastic wrap and flatten into a disc shape. Chill the dough for 1 hour.

In a clean food processor, combine cream cheese, vanilla, almond extract, and honey. Blend until smooth.

Put the apples in a microwave safe dish along with the brown sugar. Microwave for about 5 minutes. Stir. Cook for another 3 to 5 minutes or until soft.

Position an oven rack in the center of the oven. Preheat oven to 400 degrees.

Roll the dough out on a floured surface with a floured rolling pin. Roll it into about an 11 inch circle. Transfer the dough to a baking sheet. Spread the cream cheese mixture over the dough, leaving about a 2 inch border. Arrange the apples on top of the cream cheese mixture, covering all of the cream cheese surface. Heat the jelly in the microwave for a few seconds so you can spoon the liquid over the tart easily. Fold the remaining edge of dough over the filling to form a border so the “yummyness” doesn’t ooze out. This isn’t the most beautiful dessert but don’t let its rustic presentation fool you – it is DELICIOUS!

Bake the tart until the crust is golden, about 30 to 40 minutes. Place the baking sheet on a rack to cool for about 10 minutes. Serve.

Post to Twitter Post to Plurk Post to Yahoo Buzz Post to Delicious Post to Digg Post to Facebook Post to MySpace Post to Ping.fm Post to Reddit Post to StumbleUpon

Blueberry Almond Crumble

The fourth of July is quickly approaching – are you having guests over or will you be attending a barbque bash?   Do you need to make a dessert for this shindig and your tired of the overdone jello desserts, layered trifles, or flag cakes?  I’ve got something just for you – it is simple, delish, – and blue!  It is also fabulous with homemade vanilla ice cream if you are like my family and look for excuses to make homemade ice cream!

:: Blueberry Almond Crumble

Pie Filling:
1 pint of blueberries
1/3 cup sugar
1/2 cup water
1 1/2 Tbsp cornstarch
1 tsp pure almond extract

Crumble Topping:
1 cup quick cooking oats
1/3 cup brown sugar
1/2 cup sliced almonds
1 tsp cinnamon
5 Tbsp butter, melted

Simmer blueberries, water, and sugar in a saucepan. Mash some of the berries but leave some of them whole. Add cornstarch and simmer until thickened. Remove from heat and stir in almond extract.

Preheat oven to 400 degrees F.

Pour blueberry filling into a 8×8 Pyrex dish.

Combine all the crumble topping ingredients and stir to moisten. Sprinkle topping over blueberry filling. Bake for 20 minutes, or until topping is golden and blueberry mixture bubbles. Serve warm with a scoop of vanilla ice cream.

I am a participant in the Walmart Moms program. Walmart has provided me with compensation for my time on this post.  Participation in this program is voluntary.  As always, all opinions are 100% my own.

Post to Twitter Post to Plurk Post to Yahoo Buzz Post to Delicious Post to Digg Post to Facebook Post to MySpace Post to Ping.fm Post to Reddit Post to StumbleUpon

Father’s Day Fun!

In my family father’s day is a fun day!  Because it falls during June, when it is scorching hot in Georgia, it means we’ll be spending the day cooking out and swimming in the pool!

No elaborate meals to be made here, just simple grilling out with all the yummy southern fixins’ and lots of iced SWEET tea! LOL!  What’s on the menu?

  • grilled hamburgers and hotdogs
  • chips
  • baked beans
  • homemade coleslaw (just cabbage, carrots, mayo, and a 1/2 tsp of sugar and some salt and pepper!)
  • homemade potato salad -the best EVER!
  • sweet tea
  • watermelon
  • homemade ice cream

Here are some ways that we turn simple food into fabulous:

  1. Butter the top sides of the hotdog buns and the insides of the hamburger buns and place them on the hot grill for a few minutes just before serving.  They taste SO much better this way!
  2. Cut and freeze the watermelon before the party – it is different and delicious this way!
  3. You can’t beat homemade southern sweet tea (I make mine with 3 family sized tea bags brewed in hot water and 1 1/4 to 1 1/2 cups of sugar to make a gallon).   But, mint tea is really delicious too!  I use the same method but I put several sprigs of fresh mint into the pitcher and squish it around a little with my spoon before adding the hot tea and sugar.  It is so refreshing!  Serve either (both!) over lots of ice!
  4. Using good quality meats helps too – I’m using local grass fed beef and Oscar Mayer’s Angus beef hotdogs (they don’t have nitrates/nitrites and they are cheaper than other brands – not to mention available anywhere!)

And speaking of homemade ice cream, here’s my favorite recipe (and Judah’s too!  He calls it pink ice cream):

:: Super Duper Strawberry Ice Cream

4 to 6 cups of fresh (or unsweetened frozen, thawed) strawberries
1 1/2 cups sugar
2 cups of organic heavy cream
2 cups of organic half and half
2 tsp of good {pure} vanilla extract

Start by mashing the berries. I put mine in the food processor for a few seconds- not too long because I like to have some chunks in my ice cream! Stir in 3/4 cup of sugar. Let stand for about a half hour (long enough for the berries to become macerated – releasing their juices and making a syrup).

Add the heavy cram, half and half, remaining 3/4 cup of sugar, and vanilla to the strawberries. Stir it up and refrigerate, covered, until very cold (about 3 hours but you can do this up to 2 days in advance).

Stir the mixture to blend and pour into the canister of your ice cream maker.  {I use a Cuisinart 2-Quart Coutnertop Ice Cream Maker} Follow your ice cream makers’ directions for how long to freeze. Eat immediately – but hey, I didn’t have to tell you that!

How about you?  What plans do you have for father’s day?  Do you do a fancy sit down meal, are you taking dear ol’ dad out for lunch/dinner,  or are you planning to fire up the grill?

I am a participant in the Walmart Moms program. Walmart has provided me with compensation for my time on this post.  Participation in this program is voluntary.  As always, all opinions are 100% my own.

Post to Twitter Post to Plurk Post to Yahoo Buzz Post to Delicious Post to Digg Post to Facebook Post to MySpace Post to Ping.fm Post to Reddit Post to StumbleUpon

Valentines Day Treats

I love doing little sweet things for my family on Valentines Day.  My plan this year is a Valentine’s breakfast: Heart Shaped Waffles with strawberry topping and whipped cream and a little treat during the day.  Just use your favorite waffle recipe.  Then, grab a bag of frozen organic strawberries and dump into a saucepan.  Then, add just about a 1/2 cup of water and a 1/3 cup of sugar and let boil.  Mash the strawberries up a little so that you still have some chunks.  I use a potato masher.  Then, whip some heavy cream and viola!  Breakfast is served!  Judah loves these and I actually prefer the fruit topping to maple syrup – it isn’t quit so sweet.

For dinner, I’ll probably cook at home.  But, I keep it special by making something we don’t have often.  This year we’ll be having ribeye steaks with baked potatoes, salad, butterhorns and squash casserole.

But the highlight of the day will be the treats I’ve made for my husband to take to work and my little one to enjoy at home during snack time.  They are like little snack cakes you buy at the grocery store – but SOOO much better. =)

:: Valentine Chocolate Whoopie Pies

2 cups all purpose flour
1/2 cup unsweetened cocoa powder
1 tsp baking soda
1/2 tsp salt
1 cup whole milk
1 tsp pure vanilla extract
1/2 cup softened butter
1 cup sugar
1 egg

For the Filling:
1/2 cup softened butter
1 1/2 cups confectioners’ sugar
1 cup marshmallow cream (I used my homemade marshmallow recipe)
1 tsp pure vanilla extract
pink food coloring (I used Wilton’s icing food coloring)

Heat the oven to 350 degrees F. Line baking sheets with parchment paper (or Silpat mat – I love mine! It is reusable and no need to cut parchment).

In a medium bowl, whisk together the flour, baking soda, cocoa powder, and salt. In a measuring cup mix together the milk and vanilla extract.

In a large bowl with a hand mixer set at medium speed, beat the butter and sugar until evenly blended, about 1 to 2 minutes. Add the egg, increase the speed to high, and beat until smooth and creamy.

Pour half the flour mixture into the butter-sugar mixture, and beat at medium speed until combined. Add the milk mixture and continue beating until blended. Then, add the remaining flour mixture and beat again.

Place heaping tablespoons of batter on the prepared baking sheet, evenly spacing the batter. Slightly flatten the heaps with the back of the spoon.

Bake the cakes for 10 minutes (or 7 on speed bake). They should be moist and spongy. Let them cool for 2 minutes on the baking sheet. Then, transfer to a baking sheet to cool completely.

Using an electric mixer, mid all the filling ingredients (except coloring) in a medium bowl until evenly blended. Then, add the food coloring to give the icing a Valentine’s Day hue. =)

To make each pie, spoon and spread about a heaping tablespoon on filling onto the bottom a cake then sandwich with another cake.

Post to Twitter Post to Plurk Post to Yahoo Buzz Post to Delicious Post to Digg Post to Facebook Post to MySpace Post to Ping.fm Post to Reddit Post to StumbleUpon

Cookie Pressin’

I am so glad it is winter and I can crank up my oven without worrying about heating the house up!  Actually, the warmth from the oven is a welcomed thing lately!  Brrr!  I’ve been baking cookies left and right and just the other weekend I hosted my very first Cookie Swap!  We had a blast!  I love baking cookies of all shapes, sizes, and varieties.

Lately, I’ve been trying to learn to make sugar cookies with royal icing.  It is definitely an art I’ll have to keep practicing!  Some of the other kinds of cookies that I still want to learn: varieties of spritz cookies, thumbprint cookies, & linzer cookies.  And, I’m two steps closer!  Just this month I received a coveted cookie recipe for Thumbprint cookies that I’ve been begging for for months.  I am so excited to actually make them!  I bought a linzer cookie cutter set (but I haven’t’ tried it out yet).   And, I received my very own cookie press from Pampered Chef, so I’ve already given it a spin to make spritz cookies!

I actually have a few Pampered Chef items already.  I tend to go for the items that I haven’t seen anywhere else – like the  sandwich cutter that makes sandwiches like Smucker’s Uncrustables that I bought last year and the vegetable peeler that Julienne’s.  Both are very cool and have been used repeatedly.  So, when I was asked to review the Pampered Chef cookie press I answered with a giddy yes!  I have been wanting a cookie press for a while and I’ve been pleased with the quality of the other items I have from them.

The Pampered Chef cookie press comes with several discs to attach that press out all sorts of shapes of cookies (there are 10 discs included).  It also has a disc that will rice potatoes!  In these photos I filled the press with a sugar cookie type spritz dough and went to town with the wreath/snowflake shape.

This was my very first time, and it was really simple!  So, even if you’ve never used one before it is pretty “plug and play.”  You just fill it with dough and then turn the handle about a third of the way around.  And viola! So simple!  I can’t wait to try other types of spritz!  So, if you are in the market for a cookie press, I recommend this one!  I can’t say I’ve used other brands (so I can’t compare) but I have used this one, and it works fabulous!  I know a certain someone who wants one of these and if she doesn’t get one this week, I just might have to buy another one of these for her birthday! =)

There are so many good recipes for spritz cookies too!  The next one I want to try is a cream cheese dough. Mmmm.

Here’s the one I used.

:: Golden Snowflakes

1 1/2 cups butter, softened
1 cup sugar
1 egg
2 Tbsp milk
1 tsp almond extract
1 tsp vanilla extract
3 1/2 cups all purpose flour
1 tsp baking powder
Nutella
Gold pearl dust

In a large bowl, cream butter and sugar until light and fluffy. Beat in the egg, milk, and extracts. Combine flour & baking powder; gradually add to creamed mixture and mix well.

Using a cookie press fitted with any shape you want (I used wreath/snowflake), press dough 2 inches apart onto ungreased baking sheets. Bake at 375 degrees F for 8 to 10 minutes or until set (not brown). Remove and cool on wire racks.

Once cookies are cool, they are fabulous just as they are. But, to add a little pizazz, spread the cookies with Nutella and top with another cookie (to make a sandwich). Then, brush tops with gold pearl dust (you can get it at most craft/bake stores – like Michael’s. It is by Wilton). Store in an airtight container.

This is a review – obviously.  I recieved the Pampered chef in exchange for my feedback.  The opinions here are my own and are totally honest!  What can I say, I love to bake and it is easy to give a good review of a product when it is a GREAT product! =) And that just goes to show, I only review products that I love and that I can get behind 100% – you can count on me!

Post to Twitter Post to Plurk Post to Yahoo Buzz Post to Delicious Post to Digg Post to Facebook Post to MySpace Post to Ping.fm Post to Reddit Post to StumbleUpon

Meal Solution #7 – Cookies!

So this week, I’m mixing it up a bit.  I usually do a meal solution post every other Wednesday to share with you what is on sale at Walmart to make meal time fast – and then I give you my spin on it.  However, this week I’m doing things a little differently.  I’m not focusing on a meal – I’m doing dessert.  And, due to the season that we’re in I want to share a fabulous (low fuss) cookie recipe that is sure to wow this season!

I’m going to break the ingredients down for you by price, like I always do for these posts.  And the feature ingredient: Pistachios! {I like to think I’m on Iron Chef!}

  • 5 lb bag of sugar (Great Value Brand) $2.54
  • All Purpose Flour (King Aurthur – I always buy this brand and I ALWAYS buy it at Walmart) $3.16
  • Pistachios (8 oz bag) $3.98
  • Nestle Toll House Milk Chocolate Chips (12 oz) $1.94

And how am I using these ingredients?  I’m making Pistachio Chocolate Batons -of course!  Ok, so maybe it wasn’t that obvious.  These are the cookies I made for the cookie swap and they got rave reviews.  Several of the ladies said they kept these cookies all to their selves when they got home. =)

:: Pistachio Chocolate Batons

3/4 cup of butter, softened
1/3 cup sugar
1/3 cup almond paste
1 egg yolk
1 2/3 cups all purpose flour
1 cup (6 oz) milk chocolate chips
1/2 cup pistachios, very finely chopped

Preheat oven to 350 degrees F.

Cream the butter, sugar, and almond paste in your mixer until well blended and fluffy. Beat in egg yolk. Gradually add flour in three additions and mix well. Roll all the dough into a ball and flatten. Wrap in plastic wrap and place in refrigerator for about an hour.

Divide dough into eight equal portions. Then divide each portion in half. Roll each portion with your hands like a snake on a lightly floured surface (this is the fun part) until the dough is about 12 inches long.  Cut each rope into 2 inch lengths making 6 batons per rope.

Place 2 inches apart on a cookie sheet covered with parchment paper (I use a Silpat Nonstick Baking Mat &  I love that it is ready to go – not cutting or greasing- and reusable).  Bake at 350 for about 6 to 8 minutes, or until edges are lightly browned (be careful – these cookies are done even when they don’t look done!).   Remove to wire racks and let cool completely.

Microwave the chocolate until melted and smooth.  Dip one end of the cookie in the chocolate then dip into the pistachios.  Place on wax paper until set.  Store in air tight container.

*Note- I had the hardest time finding almond paste.  But, it was worth the effort to find it.  None of my local grocery stores carried it.  I also couldn’t find it at Michael’s – which surprised me.  I did find it in two places though – Whole Foods grocery and a local cake supply store.  If I were you I start there – a local cake supply or even online.

These cookies are beautiful displayed and with the green pistachios they look very festive!

This post is part of a series on Making Meals Easier for Mom (Meal Solutions). I hope you love it as much as I do! Follow me and my fellow Walmart Moms, Jenn at Frugal Upstate, Heather at The Domestic Diva, and Lori at My Wooden Spoon, to get a fresh take on a new meal plan each week. Walmart has provided me with compensation and a gift card in return for this post. Participation in this program is voluntary. All opinions are my own.

Post to Twitter Post to Plurk Post to Yahoo Buzz Post to Delicious Post to Digg Post to Facebook Post to MySpace Post to Ping.fm Post to Reddit Post to StumbleUpon

RSS Subscribe by Email Twitter Facebook Send an Email YouTube

Grab a Button
Wholesome Mommy
<a href=" http://www.wholesomemommy.com " target="_blank" ><img class="aligncenter" src=" http://wholesomemommy.com/wp-content/uploads/2010/04/WholesomeMommyButton.png " alt=" Wholesome Mommy" height="125" width="125" /></a>